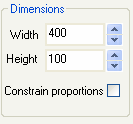
To edit the dimensions of your web button you must first click on the Dimensions tab.
The dimension elements that you can edit are the width and height of your web button. (you can also select to activate the constrain proportions)

Simply define the dimension values that you want to add to your web button and click on the "Apply" button.
The final image produced by the application will have the dimension values you have given. The button will be included within the image. The button within the image can be smaller if you define non-zero margin values.
You will then automatically be able to see the result in the preview window.
Margins
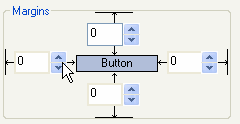
To define the values of the margins of your web button and adapt it to the your needs, go to the "Dimensions" tab and define the upper, lower, left and right margin segments of your web button.

Simply define the margin values that you want your web button to have and click on the "Apply" button.
Margin values will define the area inside the image where the actual button will be displayed. In other words, the margins do not change the dimensions of the image, but rather the size of the button itself.
Example 1

Example 2

The dimension used in the above images are equal, however the second example image shows the corresponding changes made to the margin values.
You will then automatically be able to see the result in the preview window.


