AllWebMenus Pro
Cross-browser support - Multiple menu effects, styles & themes
Powerful menu positioning options - Unicode support - HTML edit capabilities
Multiple rows/columns - Addins/Plugins - Extensions - SEO Friendly - Sitemap support
Save time
No Code - WYSIWYG
Rich UI - For All Browsers
Any Editor - Any CMS
How to use AllWebMenus with Adobe GoLive
Adobe GoLive is a versatile Web Authoring tool that can be integrated with AllWebMenus in a manner of ways. You can simply use the "generic approach" for all the pages that are created with GoLive by compiling the menus and linking to them individually. Here, we present an alternative method that you can use with GoLive to make the maintenance of your GoLive sites simpler.
Suppose you have created a site with GoLive (with the name Site) which appears as follows:
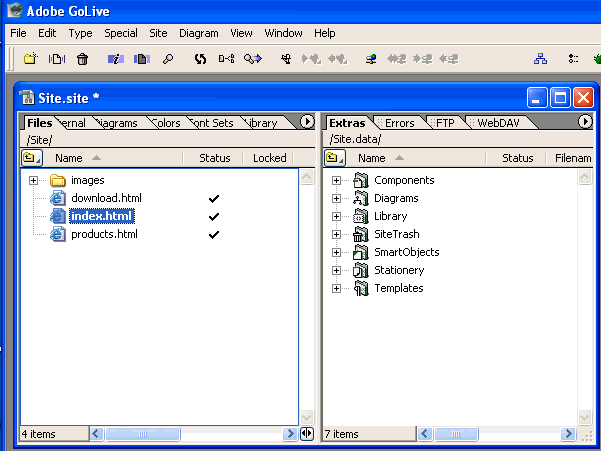
In order to attach your menus to the pages of this site you can follow the following steps.
Step 1: Create a component to be used for all your pages
Add a page component in GoLive by selecting Components, right-clicking and selecting "New Page":
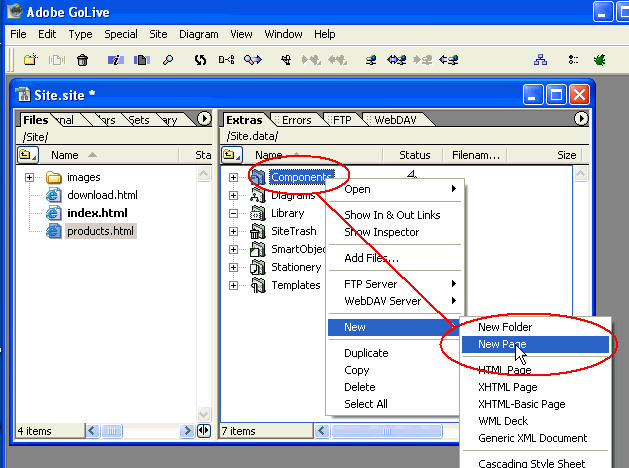
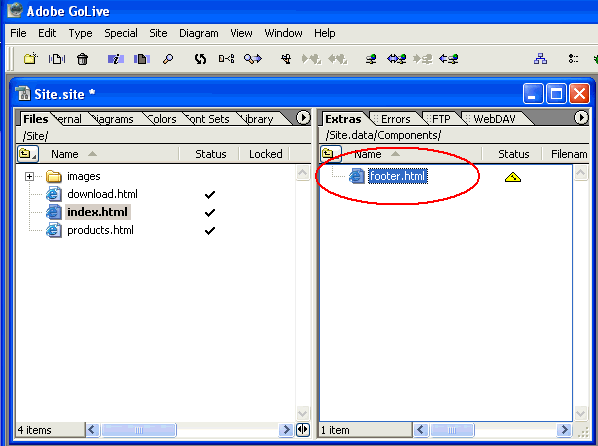
Here we select footer.html as the name of this object, but of course you can select any name you wish.
Step 2: Compile your menu
Click on "Tools Compile Menu" to compile your menu:

This opens the "Compile Menu As" dialog. Select a location under your Site structure to save your compiled menu:
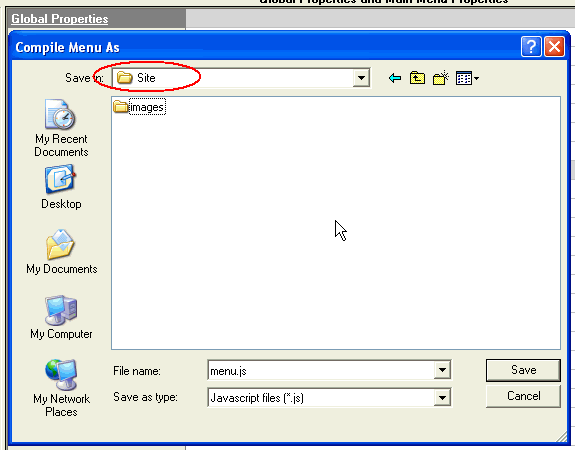
Once you do this step, all the necessary AllWebMenus files will be automatically saved inside the Site folder.
Step 3: Link your menu to your web pages
In the next AllWebMenus window, select the button that allows you to link the menu to your web pages.
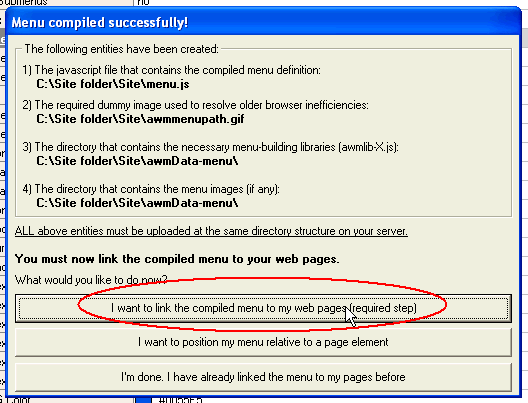
The next window in AllWebMenus allows you to select the web pages that you wish to contain your menu. You will simply need to link to the footer.html page which is found in the Site.data/Components directory. You do not need to select any of your other HTML files.
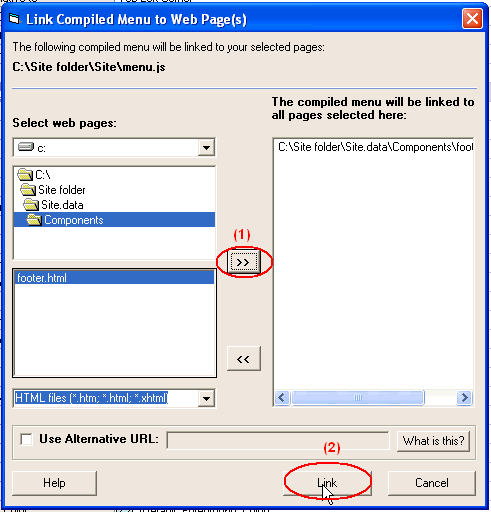
This process creates the necessary javascript code that runs your menu and adds it inside the footer.html file.
Step 4: Attaching the footer component to the HTML pages
In order to achieve this, double click on your pages in GoLive and drag the Object icon to the bottom of the page. Make sure there are no spaces or other text under the object as this can create conflicts for older browsers. Once you do this, click on Reference in the Inspector pane:
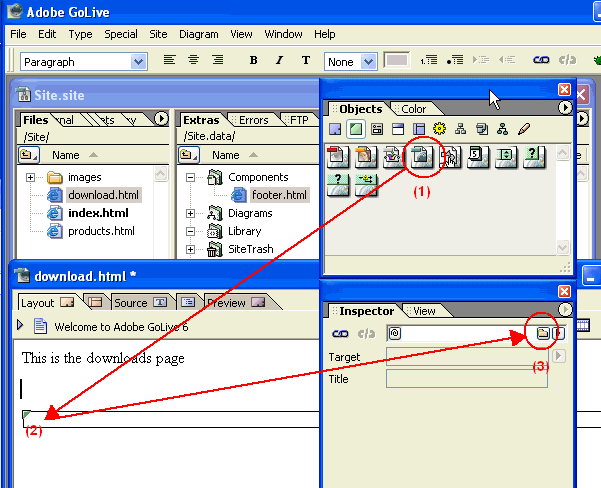
...and associate footer.html with that object:
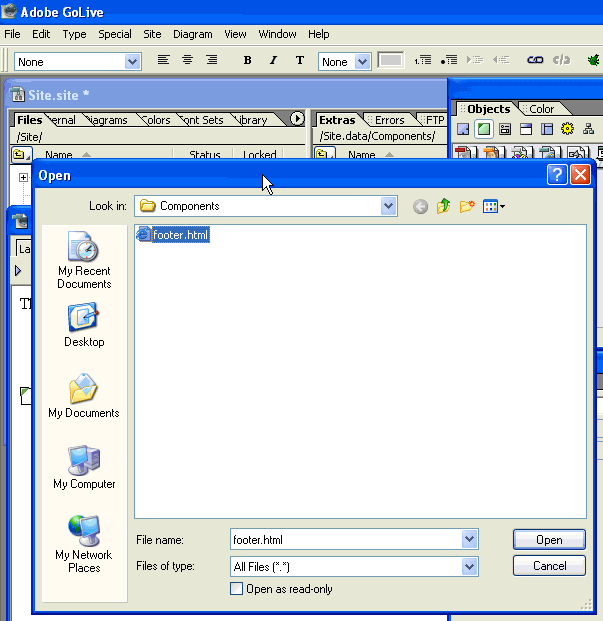
You will need to assign this object at the bottom of all your pages if you wish the menu to appear in them. If you are using a Template for your Site you can simply include the footer in the Template and all your pages will have the menu immediately on application of the template.
Step 5: Publish your updated web pages and your compiled menu files
You can use the GoLive Site FTP feature to upload the full set of pages along with the menu files to your web server:
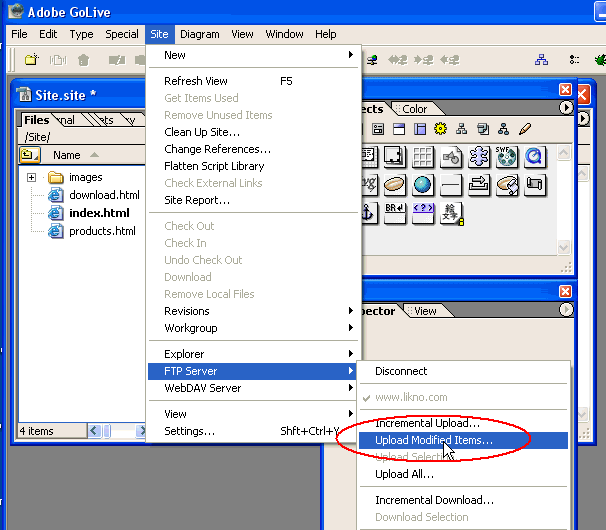
Enjoy your menus online!
AllWebMenus Pro
All Likno Products
Client Testimonials
Warning: Constant ABSPATH already defined in /usr/home/frames/public_html/likno/blog/wp-config.php on line 24
Fatal error: __autoload() is no longer supported, use spl_autoload_register() instead in /usr/home/frames/public_html/likno/blog/wp-includes/compat.php on line 502


